
 by
by
Hi Friends,
Blog buttons or badges are a great way to popularize your blog and reach a large audience. These buttons symbolize your blog and create a brand for it. People who like your blog or follow it can share these buttons on their own space and thus, expose your blog to new people!
Today we will learn the simple steps to create a blog button for our own blog. When we are finished you will have your own button like I have. 🙂
So lets start. 🙂
Step 1: Choose a photo that you would like to make your blog button. You can even create one using Photoshop or paint oe any such software.
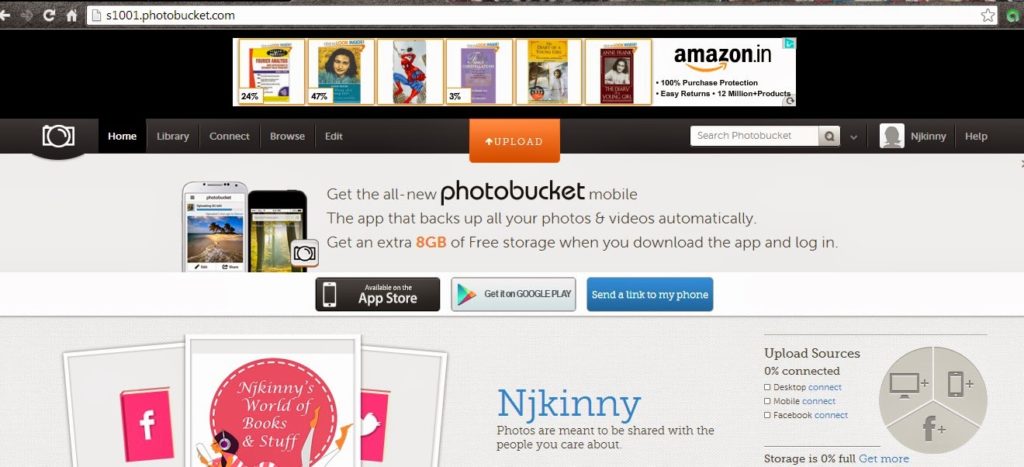
Step 2: Upload and save it on an online photo gallery like photobucket etc.
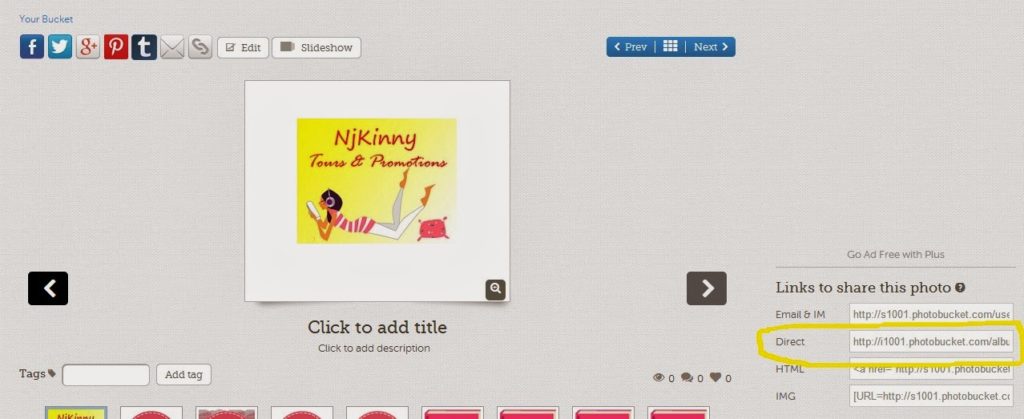
Step 3: View your photo in the Library and select the “Direct” link to the image.
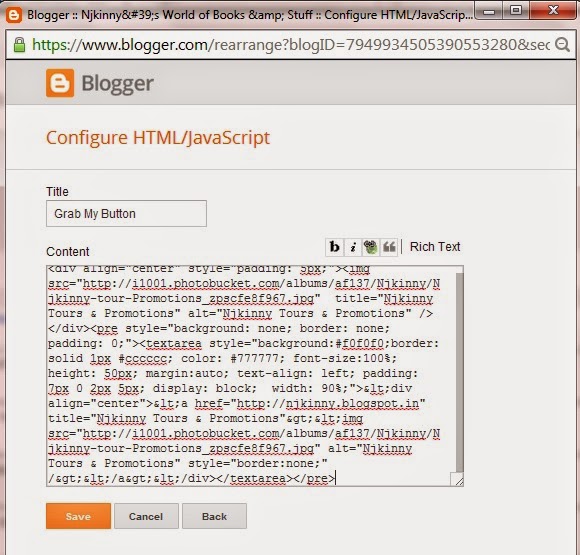
Step 4: Sign in to Blogger and Home–> Layout and select a HTML/Javascript type of gadget.
Step 5: Give it a catchy title like “Grab my button”.
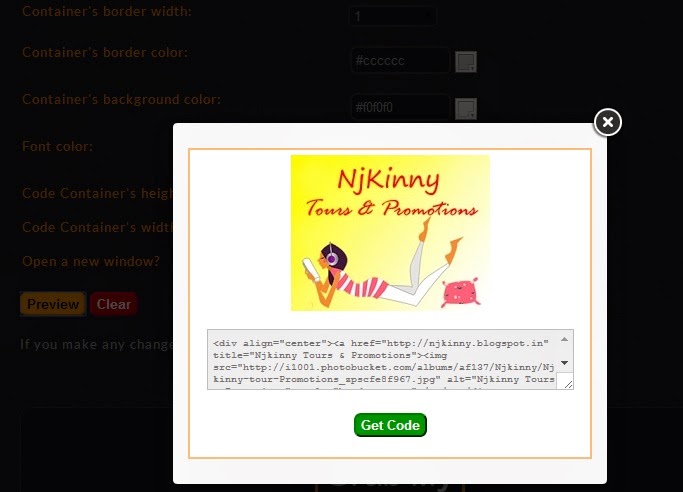
Step 6: Now we will take the help of a website called “Grab my blog button” and get a tailor made code.
Goto this address Grab My Button Code Generator and fill in your blog name, blog url and image url (the one taken from the “Direct” box on photobucket earlier).
b) Click Preview and “get the code” for your button.
c) Paste this code in your HTML gadget on blogger. Click Save.
You are all done now. Go to the blog page and view your new button!
Enjoy and I hope you find this tutorial helpful. 🙂